

Stencil Noob - Fabric Painting
- Wednesday, July 24 2013 @ 08:59 pm UTC
- Contributed by: masodo
- Views: 4,670

Soon after deciding to attend Fandom Fest (Lousville Comic Con) I started to ponder what I might wear to such an event. The "geekiest" shirt I own is my TauDay T-shirt which I considered, but did not much relish getting drawn into a lengthy debate with some mathematician eager to instruct me on the error of my ways. (This of course assumes that a Comic Con would attract those of superior mathematical prowess.) My son suggested that I dress up as Green Lantern and while the very thought may seem apealing at first, the reality is that I would not subject the general public to such a creation.
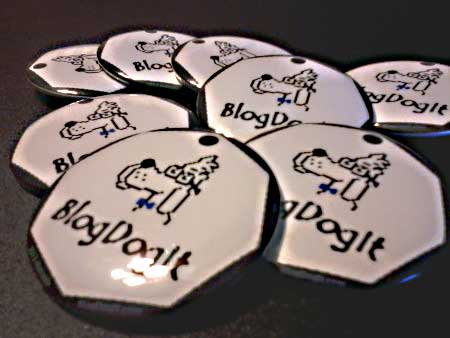 After announcing on BlogDogIt that I would be making a "personal appearance", I got it into my head that I should use the event as a vehicle to promote my blog. I had enough badge making supplies to produce a handful of BlogDogIt "tags" to use as some sort of geeky bartering currency - this was a good start. I decided however, that I must have a BlogDogIt shirt to wear and set about plotting how to bring this idea to fruition.
By some stroke of dumb luck I located my original PhotoShop file for the design of the BlogDogIt logo so I was able to enlarge and incorporate this into my design. I saved the graphic as a 150dpi TIFF (to size) and found myself at a crossroads; how do I get from "camera ready" to the runway (so to fashion-speak?)
 I had thought about taking this to a custom shirt printer (I imagine they must exist) but to produce a one-off product would surely be outside of my (virtually non existent) budget for this project. I have connections to a vinyl cutter and considered reproducing the graphic as a cut vinyl stick-on but thought it would end up just looking goofy and desperate. I know there are iron-on solutions that use the vinyl cutter but I did not have ready access to the appropriate media. It was a short hop to start thinking of the cut vinyl in terms of a stencil and my internet-based research took a turn down fabric paint alley.
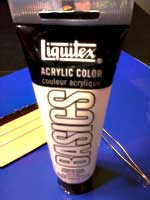 There was a lot of discussion about fabric spray paints and in fact we have several colors available in our crafts arsenal already but I wanted to do white lettering on black fabric so I needed to pick up some "white something" to do the job. I looked into Stencil Fabric Spray Paint which looked promising. It goes on thick and opaque but seemed a bit too "clunky" to apply (based on the few videos I spied.) I did not want to risk messing this up; since it was down to the wire I had to get it right on the first try. I settled therefor on hand-painting the stenciled fabric with Liquitex Titanium White Opaque Acrylic. My neighborhood JoAnns did not have the Jacquard brand paint - which seemed to be a favorite among many stencil painters - so I went with the closest competing product from their shelf stock rather than turn this into a wild goose chase for the sake of a particular brand name.
My Wife and Daughter volunteered for the hazardous duty of buying the shirt for me - they actually enjoy shopping... me? not so much. They brought back a really cool black-on-black Hawaiian print, silk, button-down that fit all the supplied criteria. Being unsure how it was going to turn out, I was anxious to get this show on the road and wasted little time setting the stage.
[tag:musing art diy tips educational pictures]
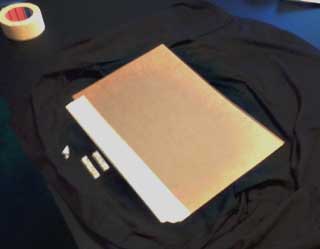 The stencil I made measured about 13 inches across. The first thing I did to prepare the shirt was to tape an 11"X17" piece of craft board to the back side of the surface to be painted as a blotter for any bleed-through and to act as a stretcher keeping the fabric smooth and flat (all four sides were taped.)
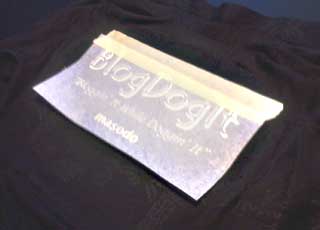 Turning this "canvas" over I positioned the "weeded & taped" cut vinyl, carefully centering and leveling and applied a tape hinge to hold it in place. Flipping the graphic back on its hinge allowed me to remove the release liner from the adhesive back of the vinyl. I then very carefully squeegeed this flap-o-graphic into contact with the shirt.
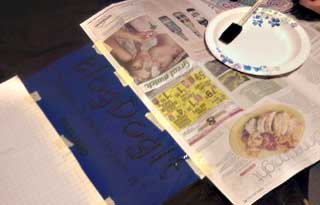 With the stencil firmly in place I taped on some masking aprons to lesson the likelihood of getting white paint anywhere it was not wanted. A quarter sized blob of paint was placed in the center of a paper plate pallet.
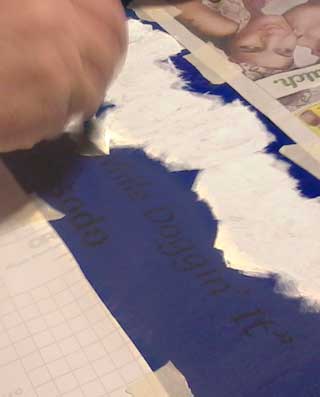 The paint was then applied sparingly with a new 1" sponge applicator brush using a dabbing action (for the most part) to help insure good penetration into the cloth as well as to help the stencil maintain tight contact with the fabric.
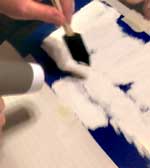 After applying a good solid coat of paint a small blow dryer was employed to speed the process of drying. Any thin spots of paint were taken care of at this time with a quick dab of paint.
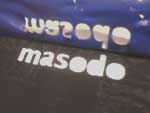
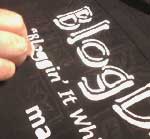 As soon as the paint was dry to the touch the vinyl stencil was removed and discarded. Tweezers were used to remove the inner bits from the closed-loop letters.
 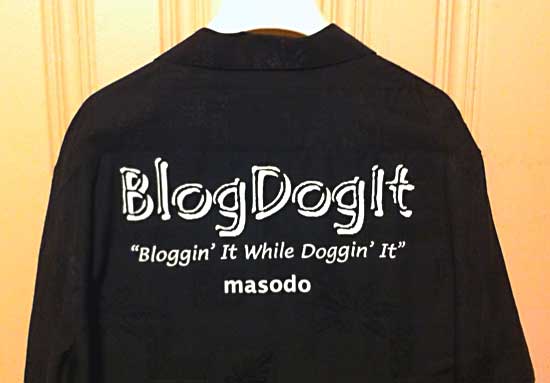 I am entirely pleased with the looks of the finished project. Hopefully this proves to be a durable application and lasts well beyond this single event. If you see me at the convention feel free to ask for a close-up inspection and I am sure you will agree, masodo now has a new skill - one that will doubtless be put to good use time and again - now that the word is out. [smiley:;)]


 Them All!


;)