Sure, I can do that (How I DIYed my auto air conditioning)
- Saturday, July 14 2012 @ 06:31 pm UTC
- Contributed by: masodo
- Views: 5,821

So I finally get the thing paid off and it seems like it has just been one thing after another with this ol' truck of mine. I suppose I should be thankful for the lack of car payments so that I have more cash on hand to tackle these repairs.
A couple of weeks ago it was the catalytic converter that needed replacing. A couple of weeks prior to that it was the radiator that threw in the towel. These came on the heals of the front brake job that could wait no longer.

This time it was the air conditioner that gave up the ghost. At first I thought it was just the compressor clutch and researched what it would take to replace it. The part was around $50 but all the "experts" where recommending that the entire compressor/clutch unit should be swapped out to avoid the inevitable compressor failure that was waiting just around the bend. So while I was debating the merits of following this sage advice my a/c compressor froze-up, the bearings were shot and that clutch was making the god-awfullest racket you ever did hear.
••• please read on •••
Air conditioner work has always been one of those things that conventional wisdom suggests we should just "leave to the professional" and I have always been an advocate of that way of thinking. However, the spit-ball estimates I was getting for this repair where falling in the $600 ~ 800 range - that my friend made the $50 compressor by-pass pulley or the shorter serpentine belt seem like no-brainer options for this tight wad. On the other hand, the fact that we were setting in the middle of a heat-wave would have made going without air conditioning on my daily commute a tough row to hoe, in no uncertain terms.
Perusing the interwebs, I sought and found some detailed discussions on the ins and outs of automotive air conditioner servicing with a particular focus on compressor replacement. I studied proper procedures for system evacuation and recharging using manifold gauges and vacuum pumps. The actual replacement of the compressor looked to be pretty much nuts and bolts/plumbing type stuff and since the compressor was setting right there on top of the four cylinder engine in my 2000 GMC Sonoma, I was lulled into the feeling of "I can do this!"
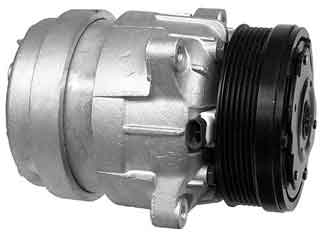
Okay, so I knew the first thing I had to do was buy a compressor. I went back to AdvanceAutoParts.com and found a re-manufactured model for about $280 plus got to take 15% off if I ordered on-line so with taxes and core charge it came to just over $265. I also knew that before I could work on the system I needed to have the refrigerant evacuated and the lines depressurized. I had discovered in my research that this was something that JiffyLube was equipped to do so I phoned my neighborhood guys and was told that they would do a complete refrigerant replacement for $129.95. I explained that I was going to remove and replace my compressor and ask if we could do this in two steps and was told "sure" and was assured they could get me right in.
True to their word JiffyLube took me straight in, hooked my a/c to the high-tech sucking device and after about 15 minutes they where done and told me to come back when I was ready to "fill 'er up." Just like that! Also - one of the fellows working there had mentioned that he had replaced the compressor in his moms car and told me that I needed to be sure to purchase the accumulator/dryer and the orifice tube or else the warrantee would be voided for the compressor and reminded me to be sure to prime the new compressor with PEC oil by pouring it in the suction side and turning the shaft to circulate the fluid through to the other side. He also reached in and unplugged the clutch wires on the compressor to insure that it would not try to engage - thank you sir.

The actual labor of replacing these parts was pretty much as you might imagine: finding the proper tools for the job, trying not to drop said tools (into the worst possible, barely accessible cavities or beneath the vehicle), getting things to turn when you can only move the dang tool seemingly 1 degree of arc., burning flesh on hot engine parts and all those things that keep a shade tree mechanic coming back for more.
What follows now is not so much a "how to" but rather an outline of what I did with some pointers that I picked up along the way.
It seems like the whole compressor oil business is classified information. Trying to determine the type and amount of oil to use is a lot harder to glean than it really should be. The instructions that came with the compressor say to check with the manufacturer for this information but there seems to be no hard and fast data that applies to component replacement. I gather that the complete system requires something like 9 ounces when assembled at the factory but the oil travels throughout the system and there is really no convenient way to tell how much you should add when replacing the compressor. A very popular recommendation is to remove the components and pour out the oil from them and measure how much they contained and add that amount to the new parts. Which seems like sound advice however, my compressor leaked all of its' oil all over my power steering reservoir so that I did not even get a drop from it upon removal.
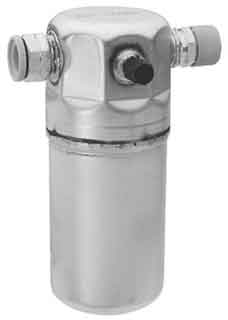
The first thing I did was remove the accumulator/dryer (a.k.a. "the can".) Pouring the oil from it into a graduated cylinder showed this to contain 2 ounces. This jibed with what I saw on JustAnswer.com where a guy said (somewhat authoritatively) "put 2 ounces in the accumulator and 3 ounces in the compressor." [On the subject of oil: when I went to buy the oil, the guy at the parts store said that the type of oil was determined by the requirements of the refrigerant so I called the lube shop and they said their refrigerant was compatible with all PAG oils so I just grabbed a bottle of PAG150 on a gamble. I was betting already that the "experts" would tell me what to buy but since they seemed to be clueless then how critical could it be, really? Research after the fact tends to reassure me that PAG150 for a GMC was a good choice but I will advise you to "know before you go."] I measured 2 ounces of PAG150 and poured half into each side of the new "can", replaced the dust caps and set it aside. I went ahead and measured 3 ounces of PAG oil and slowly added it to the suction side of the compressor (I placed my thumb over one of the holes and turned the compressor shaft in the proper direction and could tell it was the blowing side so deduced the other hole must be the sucker side and poured the oil into that one.) I put about an ounce in the hole and turned the shaft until it drew that amount into the innards, added a bit more oil and turned until it was drawn away then poured in the last of the 3 ounce batch and as I turned the compressor to suck in this last pool I noticed oil was starting to appear at the "blow" hole so I stopped turning. I replaced the dust caps on the holes and set the compressor aside - clutch down to thoroughly soak the inside of the front bearing in fresh lubricant.
A bit of detective work revealed that the orifice tube was inside the lower pipe going into the condenser (the inside the dash part) so I opened the high pressure line below where the accumulator can was and fished out the old orifice tube with needle-nose pliers. I am so glad I did too because this thing was very very cruddy. My short term memory was sufficient to instruct me on the proper direction to insert the new piece.


Yes, I believe this needed replacing.(image by masodo)
This might be a good place to remind you that - as in most projects of this sort - installation is the reverse of removal. That being said; those brass and aluminum fittings are notorious for wanting to cross-thread and this job was no exception. Make sure to replace any o-ring seals on these tubes and hand tighten the fittings to insure against cross-threading and then tighten so that joints are very snug but do not over-tighten.
Once that side of the system was taken care of I removed the serpentine belt with the aid of a short breaker bar and then set about removing the "lunched" compressor. When removing the refrigerant lines here, I did as I did on the other side and inserted cone shaped wads of paper towels into the open ends to keep out debris while making the switch. The new compressor came with fresh seals and these - as well as the o-rings on the other lines - got a very light coating of the PAG oil (seemed to be a good idea.) I later discovered that I should have used a high-viscosity meneral oil to pretreat the seals - too late now.
After everything was back together I went back to JiffyLube and was commended on the speed of the repair and bit my grimey nails as they performed a deep vacuum and let it set connected to the gauges watching for a leak that thankfully never showed. They charged it with 1.7 lbs of R134a and threw in a canister of UV dye laced stop-leak for good measure. I was so relieved when the engine was started and the A/C clutch kicked right in; a very short couple of minutes later the middle vent in the cab was blowing 60 degree air. I gladly gave them the $130 dollars and my thanks.
On the drive home I was taken with the notion that this is perhaps one of the most (literally) rewarding auto repairs I have ever performed. I actually shivered as the last bead of sweat vanished from my forehead in the ice cold air coming from my dashboard. I did this!
New Parts Image Source: AdvanceAutoParts.com
[tag:BlogDogIt auto mechanics tips diy K+Club]


 Them All!


