 When I learned that the church was planning to hold a water balloon fight my first thought was "this cannot happen without my video camera and me in attendance." My first words had me volunteering to document the event. And so that "snowball" was put into motion...
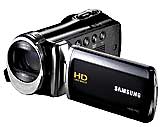 It did not take too much thought to realize that in the midst of a water balloon war is not the optimum location for the delicate, precision electro-opticals of a digital video camera (unless yours happens to be of the Go-Pro® variety.) My Samsung HMX-F90 - as it just so happens - is not designed for making movies in moisture so I had to figure out a way to take the camera out from under the umbrella and into the field of battle.
Slipping the video-cam into a Ziploc bag was the first idea that had merit but polyethylene bags are not manufactured for optical clarity and I did not much relish the thought of filming a water balloon battle as though it were a Doris Day close-up. Since I do have several bits of scrap Plexiglas in the workshop I considered cutting a disk to serve as a port-hole to allow sharply focused rays of light into the bag-o-cam.
 When I was a kid I had the plans for building an underwater camera housing using Plexiglas, epoxy, o-rings and wing-nuts-out-the-wazoo and wondered if the time had come to put those plans into action but was curious about what other "DIY" types are doing to waterproof their cameras. This is one of those questions that helps the internet earn its keep and as expected there was a fair amount of advice on building home-made submersible camera enclosures.
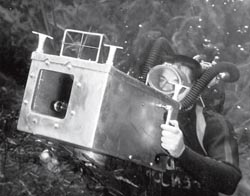
 Many of the more popular methods involved using PVC drain pipe and fittings with Plexiglas for a window - some really good ideas but these involved turning on the camera before loading into the housing and allowing it to run non-stop until its retrieval; this left a lot to be desired in the way of composing, changing focal length, reviewing shots and cinematography in general. I had to dial back the enthusiasm a bit and - by way of the drawing board - invent what I think of as a "rain coat" for my camera, as opposed to those "Helmet Diver Suits" that certainly serve a purpose but are not really what this assignment called for.
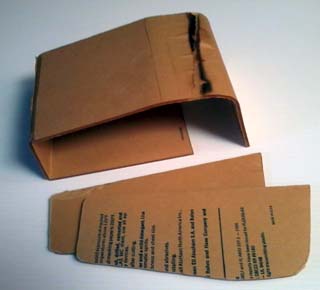
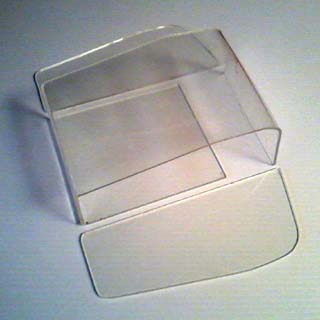
In the laboratory, er workshop I was reminded of how well suited the scroll saw was for cutting out Plexiglas [see Bridge Head Template] and returned to that workstation to get this manufacturing process under way. The dimensions for the largest part - the "wrap around" piece - was worked-out using cardboard. The locations for the bends were transferred in pencil to the protective paper coating on the stock Plexiglas. Using a pen knife I lightly scored the brown paper in the hopes this would lead to a more accurate bend.
 The bending was accomplished with the use of a heat blower gun; the material being situated between an iron straight edge and along the edge of the iron table saw top. There is a certain art to bending Plexiglas this way but it is a skill that once mastered will serve you well for many ingenious solutions. You should however, exercise great care when heating Plexiglas because the temperature at which the material bends is uncomfortably close to the temperature at which it will ignite. That being said, you are also well advised to have a fire extinguisher handy anytime you plug in the heat blower gun - just sayin'...
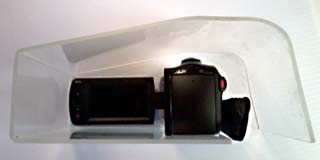 Once the large piece was formed the camera is tested for fit and I discovered the camera controls could be manipulated easier if there was just a bit more clearance space above the camera. This adjustment was made by re-heating and some creative jig rigging but ultimately resulted in a satisfactory shape which was then traced onto more Plexiglas stock to form the front and back panels. These pieces were cut out handily on the scroll saw and the next step involved the rather tedious task of removing the paper from the parts.
 The only reason I came to posses a supply of this 1/8th in. Plexiglas is that its previous owner was storing it in a poorly climate controlled warehouse and after several years of heating and cooling extremes the protective paper - which under ideal conditions is adhered with low tack adhesive - is mindbogglingly difficult to remove to expose any usable clarity. Not one to let such a valuable cache of resources find their way to the nearby land-fill I offered to let them continue in their tradition of improper storage in an out of the way nook in my unheated garage/workshop.
I will let it be known here that I have arrived at a method for removing even the most stubbornly adhered protective paper coating from even the most mistreated of Plexiglas rewarding you with crystal-clarity with a minimum of fuss. For this most valuable of trade secrets I ask only the paltry sum of $15 and a self addressed stamped envelope sent to "Tell Me How To Do It" P.O. Box 555..... but seriously here's how it's done:
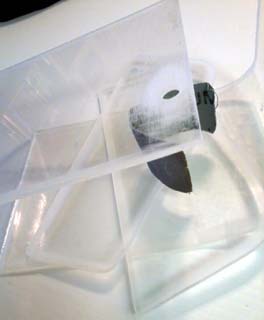 Soak the Plexiglas parts in a container appropriate for complete submersion in a mild water/ammonia solution for anywhere between overnight and a few days. This will enable you to remove the paper without much trouble. The use of a hard plastic squeegee as a scraper will speed the process and save your fingernails. The only problem now will be the glue residue that is left clinging to the precious Plexiglas. There is only one thing I have found that will cause the glue to release its death-grip and that is none other than Denatured Alcohol. In fact if you ever need to remove sticky residue (as from bumper stickers etc.) go straight for the denatured alcohol and take care of it lickety-split (of course the usual disclaimer about "check for color-fastness in an inconspicuous location to determine if safe for your application" applies here.)
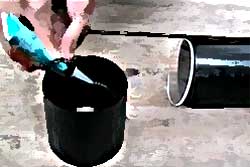
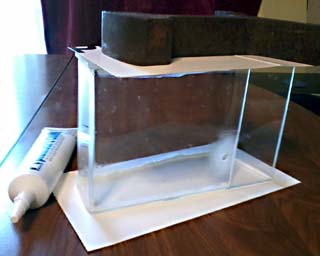 Once the protective paper with its glue mess was gone, window cleaner and paper towels finished the chore. Using a bit of emery cloth I sanded 1/4 in. bands where the Plexiglas pieces needed to be bonded to add some "tooth." At this time I also drilled the hole for access to the camera's tripod socket and scuffed that area to give a bit of grip to those surfaces. Using clear plumbers silicone caulking I applied a bead to the perimeter of the flat end pieces and assembled the project on end and weighted it down to dry overnight. The caulking goes on white but drys clear and make for a clean looking bond despite my rather sloppy caulk beads. The shape of the housing did not allow for the usual technique of smoothing the caulk with a moistened finger so it is what it is.
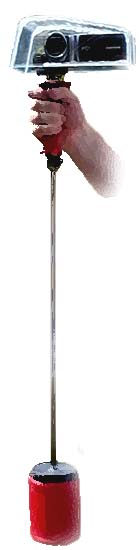 This video camera rain coat turns out to be a perfect companion piece to the "steady(ish)-cam" that was constructed for the "Rockin'4God" event [see: About this Rockin' 4 God Video] and the combination performed admirably in the heat of battle providing close-to-the-action footage that helps to make "The Balloon Fight Movie" the instant classic it is (among all those who took part in that most epic day of fellowship and fun.) The proof is in the pictures. Check out the video made with this rig and you will agree that without this clam-shell layer of protection it would have been the end of this video camera as we know it. All in all this was the proper amount of engineering to make good on my promise to "deliver the goods."
In my next post I will talk about editing "The Water Balloon Fight Movie" using open-source software and the complexities of building the soundtrack that added so much to the enjoyment of this video project.
[See BlogDogIt Article: Sound Trek]