What's A Pentium For?
Contributed by: masodo on Monday, April 21 2014 @ 11:26 am UTC
Last modified on
 Now that Windows XP is no longer a supported operating system you will find more and more of these older computers being pulled from service simply because it is thought that they are not safe and will bring harm to any network they might be connected to.
Disconnecting your old XP Computers from the network (particularly the internet) is probably good advice. Setting your XP driven computers on the curb is just plain wasteful. These old systems may well have much life left in them - particularly those older tank-built Pentium 4 machines manufactured for business use.
Before parting with your old XP computer think about whether it can be used in a single purpose capacity, also known as a computer kiosk. Is there a single program that the computer could run that might take a burden from your shiny new Windows 7 (or ok 8) computer? Imagine rather than booting-up, logging-in and starting the program; you need only turn on the machine to start the program you need.
Kiosk Mode
Regardless of your reason for running your machine in kiosk mode the key steps are going to be: 1.) disabling the log-in screen and 2.) Changing the default "SHELL" from Microsoft Windows Explorer to the program of your choice.
It is a good idea to first create a restricted user named "Kiosk" and don't even bother giving them a password.
I have already detailed the steps for disabling XP logins in a previous article [See BlogDogIt: Disable XP Login]
Here are the steps to having your computer go straight to the program of your choice when it first starts up:
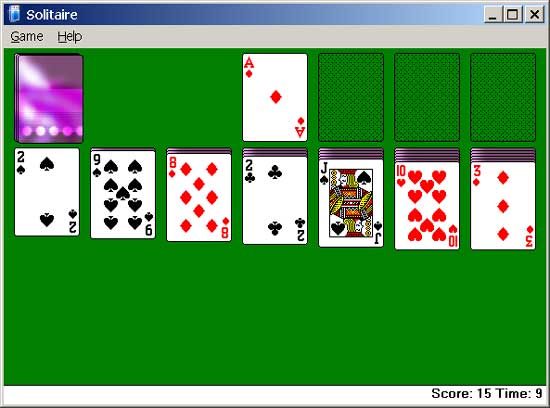
Perhaps one of the most used Windows XP applications in the world of business has been the program known as "Solitaire." This is a specialized business app that would be well suited for use on a dedicated machine in an office environment. This example will show how to set up Solitaire to run on start-up. You can apply these steps to your program of choice (PINBALL.EXE perhaps?)
The following steps should be performed while logged in as user "Kiosk":
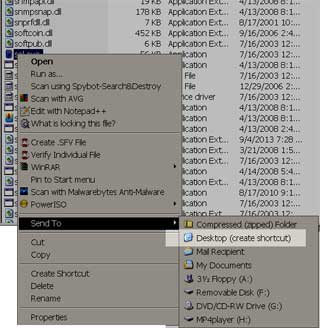 If you don't already have a shortcut on the desktop go ahead and create one by navigating to the program's excecutable file location in windows explorer. Right-click and select "Send To ==> Desktop (Create Shortcut)"
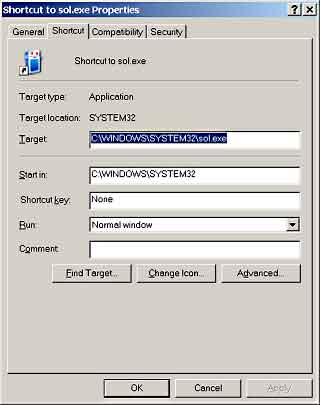 You can then right-click on the shortcut and select "Properties" - highlight and copy the "Target" line to the clipboard (so that you can paste it in the following step.
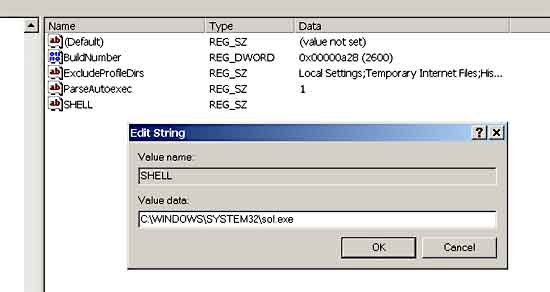
Using the regedit utility, you will need to create a new string value called "SHELL"
in the following location:
HKEY_CURRENT_USERSOFTWAREMicrosoftWindows NTCurrentVersionWinlogon
![]()
After creating the String named "SHELL" right-click on it and choose to modify its value. You may now paste (Ctrl+V) the clipboard into the "Value data:" field. Ok and close regedit.
Please note that improper use of the regedit utility can result in the untimely death of your computer. If you are still using Windows XP and have never had to use regedit then count yourself lucky and celebrate by reading something else on the internet - this article is not really aimed at you. Feel free to let your computer person see this if you are interested in a Kiosk mode computer though.
From now on, whenever you turn on the computer it will go directly to your business app. It is recommended that you do not connect such a system to the internet since the vulnerabilities inherent in Windows XP are not to be taken lightly. I hope this technique will have you thinking twice before kicking that old machine to the curb. While you're at it get a can of air and blow the dust out of the insides of that box and with any luck you might still get another year or ten out of that old workhorse.
By the way - You may also like to kill the Windows XP "Splash" screen on boot-up as well - to save yourself the embarrassment of having anyone discover your kiosk is running an ancient operating system. This is easy enough to do by adding the following switch: /NOGUIBOOT to the the end of the [operating system] line in C:boot.ini (you'll need to be an administrator to do this.)
Share and Enjoy!
[tag:tips retro computing musing]
"Dead End XP" Image Source:http://www.edudemic.com/[*1]